Record Keeping
Inventory
|
|
|
|---|
|
Record Keeping Inventory |
Numbering of Bee Hives
|
|---|
Hive numbers are not commonly employed by hobby beekeepers that may only have a few hives that are not moved around much.
However once you get above a dozen hives and nucs or several different sites, numbering makes life easier and offsets the minor cost and tedium of doing the numbering.
The benefits of numbering are greater still when combined with a record keeping system that allows beekeepers to keep track of equipment and breeding lines, such numbering also assists disease traceability should you be unfortunate enough to be struck.
I have seen brass house numbers used for hives, but there are several inexpensive sets of plastic numbers available to beekeepers via the appliance trade. The one illustrated below is made by Nicot (Nicoplast) in France and is available from E.H. Thorne. in UK.
These numbers are about 42 mm tall and are made of a soft plastic that is readily cut with a chisel or a craft knife. They are easily applied using gimp pins.
 As with most aspects of beekeeping I personally go the 'extra mile'... I number
all boxes and any special items (hence the number 500 on my hive barrow). As a result I
need many numbers and a few extra symbols. I use "L" for "Left"
"R" for "Right" and I have some items that run in
pairs which have "A" and "B" appended to their
inventory number. I make most of the numbers and all of the letters
myself. I find many sources of material in the form of spare honey
tub lids, which I have accumulated, these do not seem to fit any of
the tubs that I have spare. The templates for the "A",
"B", "L" and "R" were made by tracing
around alphabetic 'fridge magnets' and just happen to be the same size
as the Nicot numerals.
As with most aspects of beekeeping I personally go the 'extra mile'... I number
all boxes and any special items (hence the number 500 on my hive barrow). As a result I
need many numbers and a few extra symbols. I use "L" for "Left"
"R" for "Right" and I have some items that run in
pairs which have "A" and "B" appended to their
inventory number. I make most of the numbers and all of the letters
myself. I find many sources of material in the form of spare honey
tub lids, which I have accumulated, these do not seem to fit any of
the tubs that I have spare. The templates for the "A",
"B", "L" and "R" were made by tracing
around alphabetic 'fridge magnets' and just happen to be the same size
as the Nicot numerals.
I trace around the Nicot numbers using a fine felt tip pen and then cut them out using a stout pair of scissors. The holes in 6s, 8s and 9s are cut using wad punches and a hammer 0s need wad punch and chisel and the triangular cut out in the figure 4 is done with a chisel. To avoid shattering or splitting when nailing, I drill fixing holes 1.00 mm in diameter using a hand held printed circuit drill.
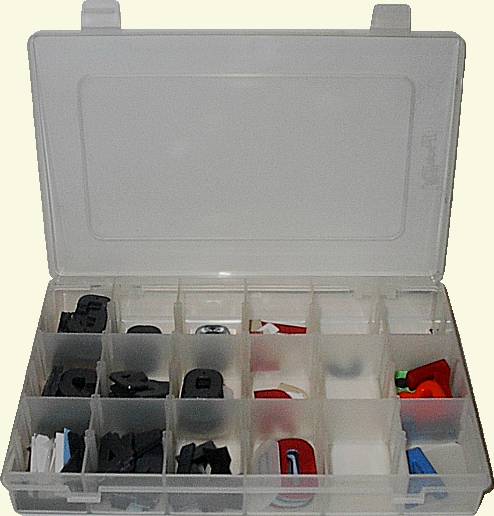
I keep my spare numbers in a compartmented plastic storage box, similar to that used by fishermen for their tackle.
There are white plastic numbers, similar to my homemade ones, that are made in the Czech Republic by Antonin Sima (Simaco). (link dud at the moment!)
 Some items are too small for the above types of number to
be applied... In this case, I put the number on with a bullet pointed
felt tip marker and then using a 5 mm diameter ball headed burr,
again fitted into the printed circuit drill, and chase around my
number producing a shallow depression in the wooden surface.
Some items are too small for the above types of number to
be applied... In this case, I put the number on with a bullet pointed
felt tip marker and then using a 5 mm diameter ball headed burr,
again fitted into the printed circuit drill, and chase around my
number producing a shallow depression in the wooden surface.
 The high speed cutting of the burr leaves a feathery edge to the
shallow curved channel, which I scrape off with a piece of hacksaw
blade that has a curved end ground on it, then I re-apply the marker
pen to the freshly cut groove using excess pressure so that a large
amount of dye is transferred, which soaks into the freshly exposed grain.
The high speed cutting of the burr leaves a feathery edge to the
shallow curved channel, which I scrape off with a piece of hacksaw
blade that has a curved end ground on it, then I re-apply the marker
pen to the freshly cut groove using excess pressure so that a large
amount of dye is transferred, which soaks into the freshly exposed grain.

The hacksaw blade can be ground to the curved shape with a sharp edge or a square edge. The one that I use was made when I was an apprentice in 1964 and has a square edge that has not needed to be re-sharpened in all of those years.
If the item is to be treated with raw linseed oil, I leave the ink to dry for 24 hours otherwise it bleeds into the surrounding surface when the oil is applied.
Written... 12 March 2002, Revised... 30 September 2002, Upgraded... 14 April 2006,
|