| "E" Home |
|---|
| Prev. Menu |
|---|
Drop Machine
Transformer
|
ELECTRONICS "A-Z" INDEX |
|---|
| Back |
|---|
|
|
Drop Machine Transformer |
55v + 55v testing Transformer |
|---|
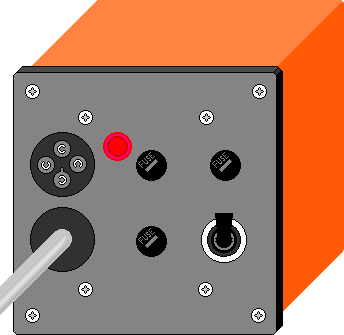 |
I describe here, the process of converting an existing bar
lighting transformer into one designed to supply power for testing
pneumatic solenoid valves. I include it here, partly as a reference
for my own use and partly to show the stages of conversion that may
help others to carry out similar conversions.
Design considerations... I was looking to provide an 110v ac source from 230v 50 Hz domestic mains supply. This is provided as two independent and identical 55v windings to give added versatility. |
|---|
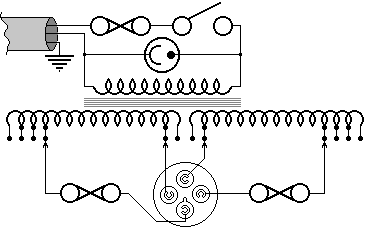
Rewinding the secondary...

| Although this was a little tedious, it was simple enough... Each layer of turns was controlled and insulated using strips of 'double sided' adhesive tape. Hand winding allows the turns to be laid precisely side by side, but can make you fingers a little sore, due to the tension that should be sustained while doing so. The tappings shown in the winding schematic are for fine tuning as the exact turns per volt ratio was unable to be precisely established. |
| Terminating the conductors and the rest of the wiring is done, following the schematic diagram at right, Insulating terminals and joints with sleeving. |
|
|---|
|
Disclaimer! I am a qualified electrical and electronic engineer and as such I take precautions to ensure my own safety and the safety of others. I cannot be held responsible for the work of others that are not under direct supervision. |
Written... Summer 2001, Revised... 12 October 2001, New Domain... 21 April 2004, |