Grafting is the most common method of queen rearing and is used worldwide. To the best of my knowledge, it is used by most of the commercial queen breeders, presumably because it is quick, cheap and reliable.
Grafting is simply the transfer of larvae that were intended to be workers into queen cell cups. In my view, and that of others, it should be termed "Larval Transfer", because that is a more accurate description, but I will continue to refer to it as grafting to avoid changing terminology.
Grafting is known universally as the "Doolittle" method, but Michael Bush has researched queen rearing methods and found that others had been using similar methods for some considerable time before Doolittle.
The Principle.
Worker larvae are transferred from cells in comb into queen cell cups, then placed in a colony that is in the right condition to convert them into queen cells. It's that simple!
Why Graft?
Grafting is a good method for those who want a reasonable number of Q/Cs because it is easy to control. You decide which larvae to use and, within reason, they are all the same age. Once set up, it is quick and any rejects can be regrafted easily. Many "Queen Rearing" lectures and demonstrations concentrate on grafting, but I think it is not worth the small scale beekeeper learning how to do it, when there are easier methods that may suit them better. I give workshops and demonstrations and find that only about 20% of beekeepers master it. As it is the method that is pushed by everyone, they think it is the only way to rear queens and give up. What a pity?
Size and Age of Larvae
Worker and queen larvae receive the same food for the first 48 hours, i.e. 5 days from the laying of the egg. The ageing of larvae is an important part of beekeeping and should be taught by BKAs. This is easy to do yourself by checking daily after a queen has started to lay. Larvae that are too old will not receive the full amount of food and will make poor queens, so knowing the age is very important.
I prefer to use the smallest larvae I can easily handle and to try to use those of the same size, so aim at 24-36 hours old. This ensures they all emerge at roughly the same time. I think it is a mistake to attempt to use larvae that are too small, because they are very delicate and easily damaged. In my experience, the smaller they are the more casualties there are and that may be the reason why.
Wet or Dry?
Some graft "wet", which is where royal jelly that is harvested from existing Q/Cs is diluted with distilled water and placed in the cell cups. It is claimed it is easier to float the transferred larvae into the cell, prevents drying out, gives the larvae a good start and increases acceptance. I have tried both "wet" and "dry" grafting on enough occasions to say that I haven't seen any obvious difference, so I now graft dry. You please yourself, because that's what you will be happiest with.
"Double Grafting".
It is sometimes advised, especially in older books, to graft in the normal way, then after a day remove the larvae and graft again with fresh larvae onto a large bed of royal jelly. The idea is that this causes the second batch of larvae to be better fed than the first lot. It has now been shown this may not be a good thing to do, because the royal jelly changes as the larvae gets older.
Conditions.
Many of the books will tell you to perform grafting in a room with a constantly boiling kettle to keep the atmosphere humid. This may be desirable, but not always necessary. Like Dave Cushman did, I do most of my grafting out of doors. I use a hive roof on a colony that is a comfortable height and that is it. I don't bother about hot water bottles, towels or any of the other aids that we are told are essential. Temperature isn't too important, as I have grafted on days when it has been rather cool, others when very hot. What is important is the larvae shouldn't dry out and that can be caused by direct sunlight or wind.
On July 2nd 2013 I was involved in filming for a couple of beekeeping teaching videos. It was a boiling hot day with little breeze. I demonstrated grafting, including transferring larvae into cut away cell cups. It took over 2 hours to complete the whole bar of 10. As it was done for the camera, I didn't intend to use them, but I had another colony where we filmed it with a queen, then removed the queen and filmed it again 2 hours later to see the difference in behaviour. Just to see what happened, I put the cell bar in this colony. When I checked the next morning, there were 8 acceptances! This is more than I normally expect to achieve, especially in view of the following:-
- The larvae had been in the open for up to 2 hours in high temperatures.
- The cell bar was filmed from all angles and had sun or lights shining on it.
- Larvae were grafted into new JzBz cups that hadn't been in the colony to "condition".
- Larvae were grafted "dry".
- Hive roof was hot.
I wouldn't normally advocate this way of doing it, but it shows what you can get away with and perhaps conditions and speed aren't as important as we are told.
What to graft into.
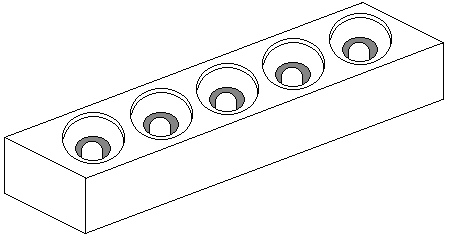
There are several types of cell cup and my earliest recognition of grafting was on a brood comb with about a dozen natural cell cups. This was at a time when few beekeepers practiced any form of controlled queen rearing, but I got more than 50% acceptance. This can still be done at a basic level with natural cell cups gently removed and fixed to a bar with molten wax.
A variety of cell cups are discussed below.
Wax Cups.
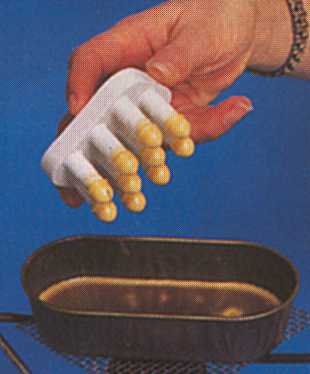
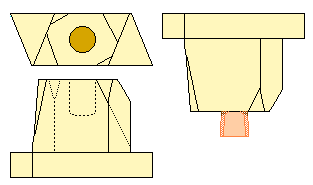
Dipped wax cups formed around a wetted wooden dowel as shown on the right have a long history. In the past, some systems have had multiple dipping 'combs' of forming sticks set at the same spacing as the cups are required, so that the cups are first dipped then attached to the bar, with molten wax, before the former is withdrawn, thus a finished cell bar is produced in one operation. I suspect this needed a high degree of skill and may not have been used much.
The forming stick is best made of beech as it is hardwood and stands up to the constant wetting and retains a degree of polish. Start with a 9 mm (or 3/8") blank, whittle it round and slightly tapered so that a hemispherical end can be fashioned that is 8 mm (5/16") in diameter. Then polish smooth with 600 grit 'wet and dry' abrasive paper. Place the stick in the chuck of a battery powered drill and wrap the abrasive paper around it with a gloved hand (it will get hot!).
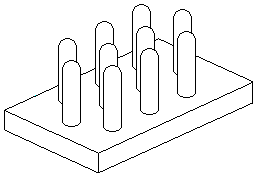
Moulded wax cups have come into use, as several can be made at the same time. The moulds are usually made from silicone rubber and usually have multiple impressions. An example is shown on the right

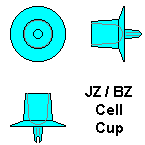
The picture at right shows a cross section of the type of wax cup that is produced from a silicone mould. It has a chunky base that helps with handling and gives rigidity to the base region that will be separated from the cell bar on completion.
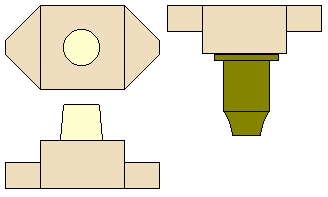
There is a further type that is a combination of the two methods whereby the 'mould'
is in the form of ten silicone rubber fingers, the tips of which are dipped into molten wax.
(Gilles Fert refers to this as the Kemp type, but I am not sure whether this is the designer's, producer's or seller's name.) The picture at far right is clipped from an old Thomas Catalogue.
Plastic Cups.
Wax cups are now rarely used and only by small scale queen rearers. They are time consuming to make and have to be fixed to a bar in some way, usually with molten wax. Plastic cell cups are cheap and easy to use. The Jz-Bz type is the most commonly used in UK and is illustrated at extreme right. They are made in six colours which helps identify which colony the larvae came from.
The yellow type shown immediate right is available in UK and fits into a grooved aluminium rail that is in turn mounted on the underside of the cell bar. This remains from the original page left by Dave Cushman. In August 2013 I was unable to find any reference to them, although there are very similar items, so I will leave it for reference. I believe this type came from New Zealand.
This type benefits from a small flat cut on the end of one of the curved lugs which allows it to 'snap' in place into the rail and gives a more secure fit. The cups can also be fitted onto tapered wooden dowels (as shown below left).
The cell space blocks shown above can be used to introduce a suitable larva to any frame that has the cell space facility.
My Thoughts on Grafting.
I prefer to use the Chinese Grafting Tool, rather than one of the many other options. Although the basic design is the same, there are many manufacturers, with very varying quality. Some are poorly made and easily break or fall to bits, so I make sure I have several of them. I like the JzBz plastic cell cups that are referred to as the "Wide Base Cell Cup" type. These are the most popular and have an oval spigot on the back, which is intended to be put in a wooden bar with a slot in and twisted until it holds. I don't use that method, but drill 10 holes in a softwood bar and nail that in a B.S. brood frame, so it twists for ease of use. The cell cups are simply pushed in the holes.
My cell bars are identified and I have 10 stations, each numbered which helps with recording. In conjunction with the colours of the JzBz cups I am able to graft larvae from more than one colony on a bar, so I know where G8 or E3 came from.
If I wish to have virgin queens emerge before I am able to do anything with them, I graft into Cupkit cells and holders, so I can cover the cells with roller cages to imprison the emerged queens. I also do this if I wish to cull emerging virgins on colour, or to check they have fully formed wings.
Plastic cell cups can be cleaned if you wish. I don't always bother, apart from removing the worst with an ice lolly stick that has been shaped. It doesn't seem to matter.
I check a couple of hours after placing the grafts in the cell building colony. Most rejects will be removed within this time. If I have time I regraft them, otherwise I wait until the next day.
Originally written by Dave Cushman. Rewritten by Roger Patterson.
Page created pre-2011
Page updated 31/12/2022